Showing posts with label fix-it. Show all posts

Fix-it Friday #53


It's Fix-It Friday over at iheartfaces again :) My favorite day of the week to blog because I always know what I'm going to post! Here are my edits for this week. Now it's your turn to head over to iheartfaces and do your own!

Original:

Basic Edit:


Cross Processed Edit:


Black and White Edit:


Digital Painting Edit:


Hope you enjoyed these and have a great weekend everyone!


Read more...

Fix-it Friday #52

Original

Great Autumn photo this week. There's so much you can do with a photo like this. Alas, I only had time to do 3. Not exactly happy with the way the photos look when posted, but I guess they'll have to do. Now, head over to iheartfaces to see more or do your own!


Edit One


Edit Two


Edit Three

Read more...

Fix-It Friday #50 <--woohoo!

Let me just start off this Fix-It Friday (#50 by the way!) with this: I hate pretty people. There I said it. Especially when they're this pretty as a teenager. Someone tell this girl you're supposed to look awkward! Makes me sick.

Original:
1st edit: Just an overall improvement of the image. Nothing fancy. Just increased the saturation, adjusted the levels to brighten it up, did two types of sharpening filters, and finished up with a warming filter. Then I just cropped it at an angle.


2nd edit: Took what I had already done with the first edit and converted it to grayscale. I had to play with the exposure a little bit to bring back some of the medium tones.


3rd edit: Another digital painting. To learn the process for this edit, click here.


To see more Fix-it Friday edits or to do your own, head over to iheartfaces!

Read more...

Fix-It Friday #49

How disgustingly adorable is this photograph? Seriously...this makes me want to have children just so I can take photos of them looking this cute :)


edit 1

edit 2 (Black & white)


edit 3 (Digital Painting)

Read more...

Fix-it Friday! #48


Wow, haven't done one of these since last year. Couldn't pass this one up though. I mean, how flippin' adorable is this little girl? So, for your viewing pleasure, here are two versions of the photo from this week's submission.

Original


Black on Black Duotone


Digital Painting

The best part of doing these means that it's Friday!!! Head over to iheartfaces to do your own!

Read more...

Fix-It Friday #18


Yet another edition of Fix-It Friday :) I love doing these, because it means the weekend is here! WOOOOHOOOO!!!! I have to shoot a wedding tomorrow, but hey....it's still the weekend! Anyway, onto the edits:

ORIGINAL


SEPIA

This first one is just a simple sepia. For those of you who don't know, I'm not a big fan of actions. Kind of like cheating to me, but to each his own. Personally, they're just not for me. I'm going to try to do little better with details of process.
1. Opened in Photoshop CS 3 and cropped
2. Changed the mode to Grayscale.
3. Did a levels adjustment to bring up the contrast without blowing out the whites of the image.
4. Used the patch tool to smooth out his skin
5. Used the paint brush (white) with a setting of 5% to brighten the eyes.
6. Increased the paintbrush size and created highlights on the tip of the nose, on the lips, cheeks, and chin.
7. Used the unsharp mask to...well, sharpen
8. Did another unsharp mask with numbers set at 15, 85, and 3 to clarify the image.
9. Did a sepia photo filter and bumped up the intensity. (by the way, you have to change the mode to RGB or CMYK to access the photo filters)
10. Added a inner shadow to focus the image on the face.

DIGITAL PAINTING
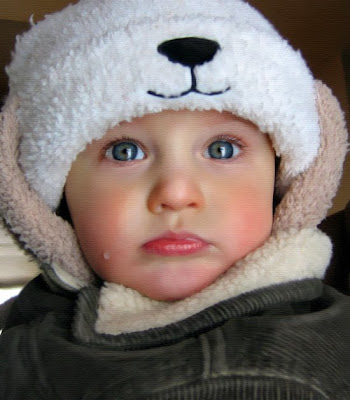
I know I said I was going to do a tutorial on digital paintings....but I've been busy (lazy). I still plan on doing a much more in depth one, but I will improve a little bit now.
1. Open image and crop
2. Increase saturation slightly
3. Surface Blur (not too much, preserve detail)
4. Use the smudge tool to soften the lines and details of the photo, especially in the background and edges.
5. Use the paintbrush tool (white) with a setting of 5% to create highlights over the entire image. A good background in art helps here. Focus on where the light naturally hits or where the cloth would be a little more worn such as the edges of the coat, the bridge and tip of the nose, lips, the rim of the hat, etc.
6. Select some of the colors from the image to highlight those areas. For instance, use the eyedropper to pull color from his eyes, make the color more intense, and then at it subtly to make the eyes pop.
7. Do the clarifying unsharp mask from the previous picture.
8. Use the Texturizer from the filter menu to add a canvas like look to the image. Looks a little grainy on screen but prints great.

BLACK & WHITE

Did I mention I was lazy? All I did for this one was take the digital painting before I added the texture and change the mode to grayscale. Then I just adjusted the levels to add contrast. Simple enough.

Have a great weekend everyone and be safe! RIP Ed McMahon, Farrrah Fawcett, and Michael Jackson.

Read more...

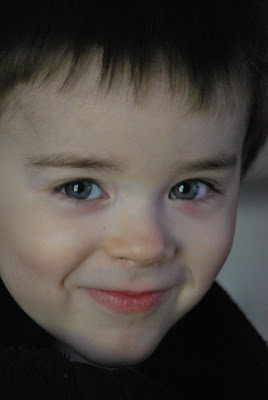
Fix-It Friday :)


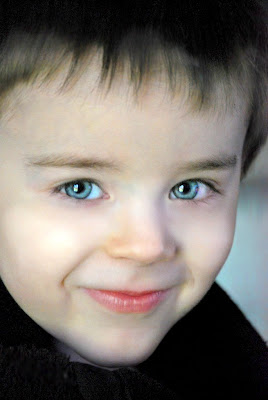
Time again for my new weekly addiction, Fix-it Friday! Since last week was my first time doing this, I decided that this week, I would do a few more edits. And because I forgot to mention last week, I use Photoshop CS3 and a bamboo graphic tablet. Here's the original:Don't know where they find these cuties, but I just love his cheeky grin. This original photo is pretty dark, so I did a levels adjustment to brighten it up overall, but I didn't want to lose too many of those dark tones. There's also not a lot of color, so I did a hue/saturation layer to bring up the cyans and some of the yellows and magentas.....I just realized how long this whole explanation is going to be....ugh. ANYWAY, here's the first edit. Just a basic "fix".
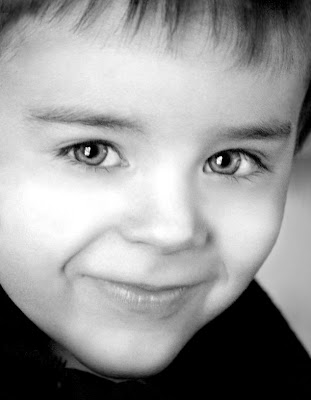
On this second one, I wanted to make it a little more dramatic. So, I turned it into a black and white image, sharpened it (b/c I don't like blurry b&ws), and did a levels adjustment to bring out some contrast. What I didn't mention before is that I went in with the paint brush to put in some highlights. Since it's so dark, there's not a lot of depth in the photo. I used white on the PB set to about 5% and painted some white highlights on his lips, cheeks, eyes, nose, etc...just to give the illusion of some natural light. Then I cropped it with a little rotation.Finally, I did another digital painting. I think I might try to do one of these every week. I know it looks similar to the first one, but I used the smudge tool along with a ton of other tricks to give it a oil-painting effect. Instead of explaining everything here, I might just do a tutorial in another post later if anyone actually wants to learn this whole process.
Soooo, those are my edits for this week. Be sure to head over to iheartfaces.com to learn lots of other tricks and see everyone's great submissions for this week. :)

Read more...

Fix-It Friday

Ok, here's my first Fix-It Friday entry. I couldn't decide what to do so I just ended up turning it into a digital painting. It was a little bit more difficult because I don't have my graphic tablet with me today, but I still like the end result. This little girl is so cute, I don't think you could mess up a picture of her :)

Before

After

I'd love to explain what I did in order, but I honestly can't remember. Sometimes I just go through the motions. Here's what I DO remember doing: Hue/Saturation layer overall, Surface Blur, used the Paint Brush to create some highlights, then a UnSharp Mask with the radius set high and the Amount set around 5% to bring out some of the contrast. I know I'm forgetting something.......hmmm.......oh well. Thanks to the ladies at iHeartFaces for this fun little project.

Read more...

  © Blogger template Shush by Ourblogtemplates.com 2009

Back to TOP